Monday, September 9, 2019
BASIL BECKY..... Gardening from the Heart: The End of A Good Thing.....
BASIL BECKY..... Gardening from the Heart: The End of A Good Thing.....: Over the past five years, I have enjoyed writing articles for State by State Publications. It was with a heavy heart that ...
The End of A Good Thing.....
Over the past five years, I have enjoyed writing articles for State by State Publications. It was with a heavy heart that I opened the email labeled "The End."
This writing adventure has taken me down many different paths. This experience allowed me to explore beautiful gardens in the region, to talking with garden gurus, to researching so many various topics, all was exciting and educational. Deadlines on articles pushed me to read, listen and learn about the many fingers of gardening and nature.
Being able to use my photos in my articles gave me joy and many times they appeared on the covers of various magazines. Not bad for an amateur hobby photographer who loves to photograph nature...just because.
I will explore other avenues to continue this adventure, including writing books and articles for anyone who will publish me. I also plan to write more in depth blogs on basilbecky.blogspot.com I hope you will continue to follow my adventures...the best is yet to come. In the meantime, buy a magazine and together we can help keep print alive.

Friday, February 22, 2019
My Favorite "A" Herb
"A" Herb
Anise Hyssop, Fragrant Giant Hyssop, Lavender Giant Hyssop, Giant Hyssop (Agastache foeniculum)
Varities: purple giant hyssop (A.scrophulariifolia), yellow giant hyssop (A. nepetoides)
Walk by my herb garden when this amazing pollinator collector is in bloom (mid-summer) and this plant is buzzing. There are bees native and non-native bees, flies, beetles, butterflies, and moths all wanting to be part of the action. Even a small sweat bee (Dufourea monardae) specializes on the giant hyssop.
One thing I really love about Anise Hyssop is that as the young leaves emerge in the spring they have a purplish cast but one quick pinch lets you know that they are anise Hyssop because of the smell so strongly of licorice (anise). That is a great help for aggressive weeders in the spring, one pitch and you know it belongs in the garden.
The other interesting thing I have noticed about this herb is that it jumps around. Perhaps it is because in my gardens I don't cut the blooms and allow them to go to seed due to pollinator love. Perhaps the pollinators consequently are spreading them around. But this is a good thing because sometimes the individual plants can be short-lived, so by allowing them to reseed you will ensure yourself a yearly growth of new plants.
The leaves can be eaten in very small quantities, and are good added to jellies, jams, and teas. I like the idea of steeping the leaves and infusing them into a cordial. A quick search of recipes using Anise Hyssop brought up many ideas for baked goods and even ice-cream. I need to try some this summer and report back.
It is fairly easy to dry and preserve, so potpourri would be fun. I did see where a Dream Pillow stuffed with Anise Hyssop, reportedly stops nightmares.
Quite honestly I don't do much besides let the pollinators enjoy this beauty. But now I am inspired to expand my horizons with this A herb favorite.
Growing Needs:
The plant seems to enjoy being on the border of my sunny herb garden. But I suspect it would grow in partial shade as well. Average Moisture is where it seems most comfortable. The summer bloom can be a range of purple to white and takes the shape of a long bottle brush. Picture erect flower spikes bearing multiple, two-lipped flowers.
This is an upright, clump-forming plant that grows 2 to 6 feet tall about 1-3 feet wide. Their leaf pattern is very similar to a mint leaf. Many times the plant will send off side shoots creating a lovely bush.
I hope you will include this herb in your garden. It is A #1.


Facts and Tidbits about this Herb:
Mass Plantings were established in the 19th century specifically for the bees. Did you know one single acre of this herb can supply enough foraged food for over a hundred colonies of bees?
Sugar concentrate reportedly is over 40% and can result in lighter colored honey with a sweet minty flavor. I know this because that accurately describes my honey and my bees love my Anise
Hyssop.
The Native Americans had many uses for this plant. From teas to medicinal bundles to protective charms, they were very aware of its powers. They used it to treat coughs, wounds, fevers, and diarrhea.
Companion Planting Note:
Reportingly Anises Hyssop helps repel Cabbage Moth.
I will be adding more Tidbits as I find them....so check-in often.
Thursday, February 21, 2019
My Favorite Herbs....by the ABC's
I love herbs and have spent over 25 years passionately growing, harvesting, using and studying all about this broad category of plants. After all one general definition of an herb is any plant, that any part of that plant has a use for mankind.
In preparation for up, coming talks and gatherings. I have decided to reacquaint my self with some of my favorites. Each Friday on my blog I am going to feature one of my favorites, starting with the Letter A and then continuing through the alphabet. Maybe I will even get through it more than once... So tune in tomorrow for my favorite "A" herb.

Wednesday, February 20, 2019
Getting Back to My Roots....
Over 60 years ago my parents made an investment for the future of their family. For their 6 young kids, they longed to have a place in the country where all of us could roam, explore, swim, ride horses and be one with nature.
Nestled in the scenic hills of Brown County Indiana and in-between their home town of Columbus and their beloved Bloomington Indiana (Home of Indiana University ), this spot was perfect.
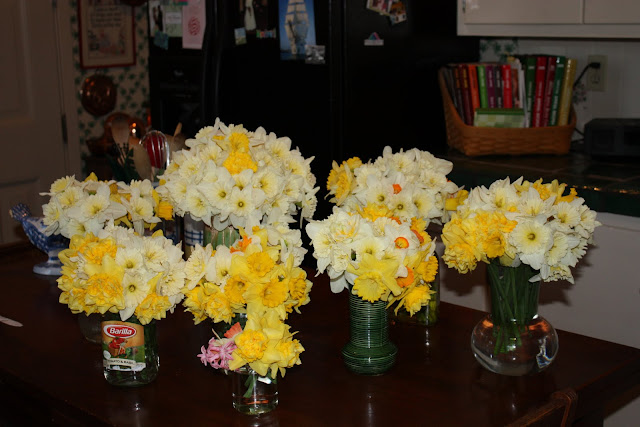
Through the years a beautiful house was built with an attached greenhouse, as well as a lake cabin. Wildflowers were encouraged to grow and daffodils were planted by the hundreds. Trees were lovingly tended but nature was basically left to flourish.
Generations grew up enjoying the property just as Mom and Dad had envisioned so long ago for their 6 “wild ones.” Weddings, engagements, parties, reunions, hiking, swimming and many other events became engrained into the history of such a wondrous space.
But as so often happens, life has a way of pushing us in different directions. When my parents passed away, a sadness fell over the land as it sat on the market for many years. It was used with love when possible, but the land was lonely.
I believe as one age sometimes you feel a calling and for my husband and myself, it was to return to our roots. By purchasing this property and keeping it in the family for generations to come. We want our children and their young kids to grow up with nature as well.
As we age it also makes sense for my husband because it sits in-between his three Blitz Builders offices and allows for a very doable commute to each one.
We will be remaining in Kentucky for now, as my heart and soul are in my gardens and historic home. However, we will be spending lots of time at the Lake. My husband loves the woods and I intend to try and restore my mothers’ wildflower gardens. It will be a very different style of gardening but I am excited to work both spaces.
After all, I have always wanted a greenhouse, I just did not realize I would have to buy 150 acres to get it!!
I will be blogging about our journey on my blog. basilbecky.blogspot.com . My intent is to continue my commitment to growing as much as our food as possible using my gardens, perhaps a bit of forging and experimenting with new ways of growing what I love. I am going to try and combine the best of both of my worlds.
I hope you will follow along on our journey. It will be challenging, exhausting but exciting and fun.


Sunday, February 10, 2019
Much Better late than never...Winter Sowing
Last year I experimented with Winter Sowing. I loved this very simple technique for starting seeds. It proved to be very successful and resulted in me having lots of perennial seedlings, that I have not had great luck with using direct sowing. I do not currently have a great place to start seeds at my house in Kentucky.
Some of my favorites were the Foxgloves, parsley, cone-flowers, Pumpkins-on-a stick, Luffa gourds, and Passion Vine, just to name a few.
I started this last year around the 2nd week of January but I seem to be way behind the garden 8 ball this year. However, it was just too successful for me not to attempt it again.
Here is an article I wrote about the experience of Winter Sowing.


Winter Sowing is a method by which seeds are sown into containers that act like mini greenhouses. These seed vehicles are then located outside, experience the chill of winter, and eventually germinate in the spring." It is a phrase that was first coined by Trudi Davidoff. You can read more about her on her website www.wintersowing.org.
I do not have a greenhouse, so finding a suitable area to start seeds is very difficult for me. The notion that I could use the outdoors as a place to start seeds set my wheels in motion, so I gave this method a try.
Now after one attempt I am hooked. That is not to say that I had a 100% success rate and all was perfect. But the pros outweighed the cons, and I am going to do this method of sowing certain seeds again this upcoming winter.
Here are the steps that I took for this project.
# I sorted through my recycling to find an assortment of potential plastic containers. Milk jugs, vinegar jugs, fresh greens containers, large fruit plastic containers, and liter beverage bottles all went into the potential greenhouse pile.
#2 I decided to start with perennials. I have good luck with direct sowing annuals in the garden but not perennials. So I end up spending a fortune on new perennials.
#3 All summer I collected seed packets, buying some when they went on sale after the planning season rush. I tried to focus on plants that I wanted in mass and ones that I have not had great success with direct sowing. Here is an example of the many ones I tried.
Parsley, both the curly and the flat leaf( I need an abundance of these for my Spicebush Swallowtails to munch on). Hollyhocks (I am still experimenting with this beauty, as it always dies in my garden. But I am determined). Butterfly Weed, (to add to my Butterfly Garden), plus some Coneflowers and various other perennials. I tried to stick to seeds that required cold stratification to germinate.
#4 Early in January, I enlisted the help of my husband to prepare the bottles for me. I have a lousy track record with knives, so I thought this the best approach.
#5 The milk and vinegar jugs, were cut open about 1/3 of the way down and just 3/4 of the way around. So it resembled a lid that opened but was still attached. By doing this, I was able to plant the seeds evenly. And I figured that when they are ready to venture into the real world, I will be able to transplant them into the garden swiftly. My husband created drainage holes on the bottom of the plastic jugs using both a box cutter and a drill to make the drainage slits and holes. The salad greens containers already had hinge type lids and just needed some additional drainage holes.
#6 I purchased seed starter mix and filled each vessel with about 4 cups of the mix. Next, I made sure the soil was wet.
#7 Following the directions for seed planting depth and coverage, I sowed each container. Then I watered them into their winter home.
#8 I marked each filled container in two places. First I used a water soluble pen and wrote on a plastic knife and duct taped it to the side and in addition, I labeled each jug by writing on the container.
#9 At this point I wished them all a good growing season and battened down the hatches. I used duct tape to seal the flip tops and made sure the caps were off the jugs and took them outside to my patio table. Since I had a somewhat eclectic array of duct tape, including Mickey Mouse, from a project with my grandbabies, my Winter Sowing project table was very colorful.
All throughout January, February, March they endured the snow, sleet, and rain and I did doing nothing to them. By April I was starting to see some sprouting, then in May, there was a lot of significant growth. Near the end of May, I began to transplant my hundreds of seedlings into pots and the gardens.
I would estimate that I had about a 60% success rate. Here are the reasons for the failures.
#1 The salad containers worked the best. The holes in the bottom of the vinegar jugs and coke liter bottles seemed to get stopped up, not allowing the water to drain efficiently. Thus causing the containers to fill with water and destroy the seedlings. So next year I will focus on better drainage.
#2 My labeling system was a big miss. I double labeled all the growing bins, but only about 1/2 of the labels were still legible. I had saved all the seed packets and had to do a guessing match game. My labeling system needs some serious TLC before next season.
#3 I need to be more proactive with transplanting the seedlings. I lost quite a few due to not separating, thinning and putting them either into pots or safely in the ground. My lack of experience with transplanting seedlings was an issue. But I learned and will do better next year.
The bonus was that I ended up with hundreds of seedlings, from Foxgloves to Parsleys to Butterfly Weed and much more. It also helped me fill that urge to get my hands in the dirt in winter and provided me with something interesting to watch all winter long. I feel my outdoor Winter Sowing without a greenhouse was successful. I hope you will give this fun project a try.
Lessons Learned:
* Label and label again and make a chart.
* Take more care with transplanting and the timing of the transplanting
* Be prepared with space, pots, and good soil to move these babies on up!!
* Be selective and pick perennial seeds that need the freeze/ thaw cycle, they do best.
I hope you will try this technique. It is not for all seed starting but works well for some!!
Sunday, January 6, 2019
BASIL BECKY..... Gardening from the Heart: Bangalore I am finally adjusting to the10 and...
BASIL BECKY..... Gardening from the Heart: Bangalore I am finally adjusting to the10 and...: Bangalore I am finally adjusting to the10 and half hour time change. Jet lag has been wicked. However, waking in the middle of the ni...
Bangalore
I am finally adjusting to the10 and half hour time change. Jet lag has been wicked. However, waking in the middle of the night has allowed me time to reflect on the last couple of weeks.
I know when I think of Bangalore, the street scenes and noises will forever be etched in my mind. The horns constantly honking as each traveler tries to navigate the chaotic masses of traffic. Motor scooters with whole families piled on, Tuk Tuks weaving in and out jammed packed buses, and cars going every direction. The streets were host to every sort of transportation imaginable. Not to mention the hundreds of people dressed in a colorful array of traditional and non-traditional wear. Oh, then there were the cows, calmly viewing the situation. My photos don't accurately show the layers of the activity. However, the people were warm, friendly and just like all of us...trying to make the best of the life we are given. I hope I have the opportunity to return, and perhaps explore other areas of this massive country. Of course, the possibility is real because as long as my grandbabies are there I will come.
I will post more blogs on this amazing journey, there were so many different parts to the three weeks ...stay tuned!!! Plus view more photos on my Instagram , basilbecky.


Subscribe to:
Posts (Atom)